HOW TO MAKE NANNARI SYRUP - HOMEMADE NANNARI SYRUP
 |
| HOW TO MAKE NANNARI SYRUP - HOMEMADE NANNARI SYRUP |
One day, my daughter out of blues said, I feel like drinking Nannari Sarbath. I felt really bad as the stock had already depleted a long time back and travelling has become the story of another era in this current situation. Felt helpless and was wondering whether I can source it out in any form.
And luckily, I should say luckily, I found a few packets of Nannari Roots when I was shopping in Indian Stores here. I have never seen these Roots before or maybe I never bothered to ponder around the shop. I found it while I was searching for Vasumbu to keep away weevils from Rice, Dhals & spices. A recent find out as suggested by my mother. Well, when I saw these Nannari Roots I was literally overwhelmed & immediately bought them. No second thought... I have never made Nannari Syrup before and only once in my lifetime, I have seen my Dad making Nannari Syrup when I was a kid. I knew Google God is going to really help me overcome this issue. Pondering through various videos and recipes, the next day I stepped into action. There goes the story of my Nannari Sarbath.
 |
| HOW TO MAKE NANNARI SYRUP - HOMEMADE NANNARI SYRUP |
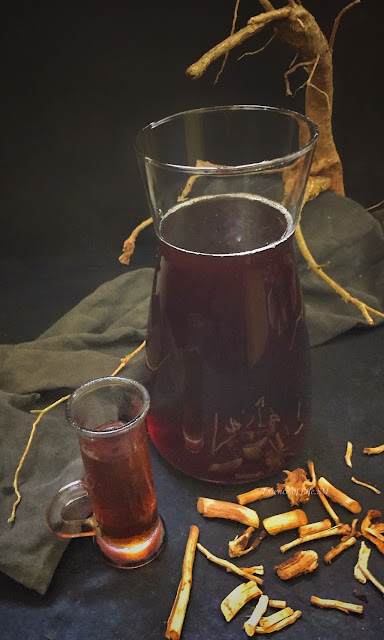
Homemade Nannari Sarbath - no preservatives, no artificial colouring & sweetened perfectly. Now I know, as I always say - Difficult looking recipes needn't be always difficult or tedious. This is a simple recipe which needs just Nannari Roots, Sugar/Palm Sugar/Jaggery and then water. That's it... Ya, what you will need is a bit of patience and a few hours of preparation. I was immensely pleased with the natural colour and the wonderful aroma of Homemade Nannari Syrup. Needless to say, the innumerable glasses of Lemon Nannari Sarbath which followed.
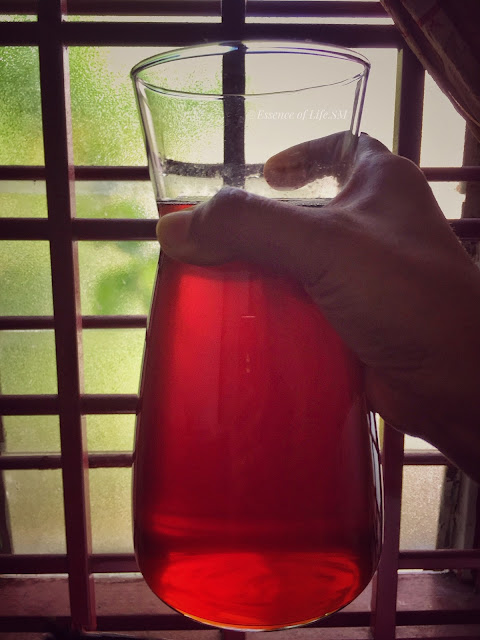
I have never ever imagined that I would be making Nannari Syrup at home. Living in a place where we cannot source out our favourites has made me try out some recipes. And this Nannari Syrup has joined the list. But I am literally happy by the fact that I am able to make it, and also I know what I add into my recipes. But the only thing which didn't mark up to my satisfaction was that I couldn't get the colour of the store-bought Nannari Syrup which would be slightly yellowish. I think they would add some artificial colour, which I had all the way thought was the natural colour of Nannari Syrup. But I am rather more convinced that the colour which I got was all-natural - a bright Pinkish Burgundy shade. Even just as it got soaked, the water turned into that hue. And the aroma!!! All through the process, I felt the smell of Nannari Roots emanating around, and I loved it to the core. Taking me into my nostalgic routes...
Cuisine - South Indian
Recipe Type - Syrup
Difficulty - Medium
Author - SM
Preparation Time - 10-15 Minutes
Recipe Type - Syrup
Difficulty - Medium
Author - SM
Preparation Time - 10-15 Minutes
Soaking Time - 6-8 Hours/Overnight
Cooking Time - 30 - 45 Minutes
For Refreshing Drinks with NANNARI/INDIAN SARSAPARILLA, Click here...
For Refreshing Drinks with NANNARI/INDIAN SARSAPARILLA, Click here...
HOW TO MAKE NANNARI SYRUP - HOMEMADE NANNARI SYRUP
 |
| HOW TO MAKE NANNARI SYRUP - HOMEMADE NANNARI SYRUP |
INGREDIENTS:
For Nannari Syrup:
Nannari Root - 100 GramsSugar - 500 Grams
Water - 4-5 Cups
Water - 4-5 Cups
METHOD:
Preparation:
 |
| NANNARI |
- I have used about 100 Grams of Nannari root in this recipe
- Wash the roots 2 to 3 times, or until the roots look clean.
- Wipe it up & Allow it to dry on a kitchen towel until all the moisture is dried up.
- Now, using a mortar and pestle, gently crush the roots once or twice so that the root loosens up and breaks into two to three pieces.
- The idea is to separate the Whitish centre portion and the Brown outer portion.
- Discard the white part and use the brown part for making Nannari Syrup.
Soaking:
 |
| HOW TO MAKE NANNARI SYRUP - HOMEMADE NANNARI SYRUP |
- Boil 4-5 Cups of Water.
- Add the Nannari Roots (the brown part alone).
- Cover the bowl and leave it aside for about 7-8 hours or overnight.
- Once soaked, the water would have turned into a pinkish burgundy colour & the intrinsic aroma of the Nannari roots would have seeped into the water.
- Strain the liquid using a fine-meshed (or double-layered) colander or a muslin cloth. Make sure there are no residues in the collected liquid.
Nannari Syrup:
- Now mix Sugar to the Nannari infused water.
- Mix well until it dissolves.
- Now heat the Nannari Syrup on a high flame for a few minutes.
- When it starts to boil, reduce the flame to medium-low.
- Boil the Syrup until it reaches a fine string of single thread consistency.
- Switch off the flame and allow the Nannari Syrup to cool down.
- Transfer the Nannari Syrup into a clean & dry bottle.
- If stored properly, Nannari Syrup, stays good up to 2-3 Months.
- Keep it refrigerated for longer shelf life.
- Can use this Nannari Syrup to make refreshing Lemon Nannari Sarbath, Tender Coconut & Lemon Nannari Sarbath or add it into your favourite Fresh Fruit Juice.
 |
| HOW TO MAKE NANNARI SYRUP - HOMEMADE NANNARI SYRUP |
NOTES:
- I have used 100 Grams of Nannari Root in this recipe.
- Make sure the root is clean without any dust & dirt.
- Wash it under running water until it is clean and wipe it off with a towel.
- Use just the Brown Part of the Nannari Roots and discard the white portion.
- Adjust the amount of Sugar to suit your sweet tooth.
- Boil the Syrup until it reaches one string consistency.
- The Syrup gets slightly thicker after cooling down.
- This will increase the Shelf life of Nannari Syrup.
- I have added no preservatives or artificial colouring in this Homemade Nannari Syrup.


0 comments